Welcome!

This is my journey in keeping my family happy and healthy.
In this day and age, what parent knows best what to do and how to care for their family?
There are so many conflicting ideas, so much wisdom, and so many paths.
It is here that I will compile information on what I have learned and the choices I am making.
Maybe my path will help others.... or not. Enjoy!

Pages

Friday, September 23, 2011

Not so HEALTHFUL RECIPES: Honey Coconut Vanilla Cupcakes


Okay, so I have to admit I eat junk too. And this is one such recipe that fills that niche. I needed to make a quick recipe for cupcakes and here it is....


I used this RECIPE and modified it to my liking and came up with this:

1/2 cup brown sugar
1/3 cup honey
1/2 cup coconut oil
2 eggs
1 tablespoon of vanilla extract
1 1/2 cups all-purpose flour
1 3/4 teaspoons of baking powder
1/2 cup coconut milk

Preheat oven to 350 degrees and then line your muffin pan with muffin papers.

In a medium bowl, combine brown sugar, honey & coconut oil. Mix with hand mixer or electric mixer. I find it's fluffier if I use one of these than if I whisk by hand.

Then beat in eggs, one at a time.

Combine flour and baking powder, and then add to mixture and blend.

Then lastly, mix in coconut milk until creamy.....

Fill 12 muffin cups just over half way. You should be able to use up all the batter into these tins. And cook for 20-25 minutes. Keep an eye on them so that they do not overcook. You will know they are done when they are golden and your tester comes out clean when inserting into the middle of the cupcake.

These are oh so yummy!! The honey-vanilla-coconut flavor makes a delicious slightly complicated flavor that makes you go back over and over for more!!

We eat these plain because they are delicious just as they are. But you can also add a yummy glaze on top.

Honey-Vanilla-Coconut Glaze

Powdered sugar
Honey
Vanilla
A touch of coconut milk

You mostly want the powdered sugar with very little of the other ingredients to moisturize it and make it syrup-y. Don't make it too runny or it will run right off your cupcakes! You want it to be just runny enough to apply but still stays in one place.

If you want a healthier version of the cupcake recipe.... here is one I attempted that turned out delicious!!

1/2 cup brown sugar
1/2 cup honey
1/2 cup coconut oil
2 eggs
1 tablespoon of vanilla extract
3/4 cup all-purpose flour
1/2 cups whole wheat flour (I freshly ground mine)
1/4 cup of ground flax seeds
1 3/4 teaspoons of baking powder
1/2 cup coconut milk (plus a dash more water to compensate for the oats)
1 cup uncooked old fashioned oats

You will end up filling more than the 12 muffin cups. I ended up filling 3 more.

I think you can really use the top recipe as a starting point and make any changes you want!! Maybe add cinnamon, or other spice... or dried fruit... the sky is the limit!! I think next time I'll add some shredded coconut. :)

Note: all the pictures are of the "healthier" version of this recipe, with the oats and other goodness...


Tuesday, September 13, 2011

HEALTHFUL RECIPES: An Improvement on my Sourdough Recipe


I have been wanting to perfect a sourdough bread recipe so that I could make it quickly and easily and not think too much about it. A recipe I could call my own. I've been scouring the web for all sorts of recipes, reading all sorts of pointers. Now I had to find a recipe that would take into consideration I have a 2 year old and don't want to dedicate my day to baking bread. And something that wouldn't be too fussy, because then I'd just end up messing it up! A recipe that had easy measurements... not something I had to weigh and measure too stringently. Something I could basically throw together and it would generally work every time. Something I could remember without checking my recipe book every minute......

My favorite recipe is this one here. Funny enough, it's for "Basic Sourdough Bread." I tweaked it a bit and this is what I came up with:

2 cups starter (100% hydration)
1 cup freshly ground whole wheat
2 cups all-purpose flour
2 tablespoons of olive oil
2 teaspoons of salt
4 teaspoons of sugar

....and mix! And knead! And let rise.... (anywhere from 1-3 hours)

Then form into loaves.... and rise again!

And then bake....

They say to bake it at 400 degrees for 25 minutes, but I really like the effects of baking it at 375 degrees for 40 minutes. They also have you do a bunch of other steps, which I just completely eliminated (I'm lazy and busy you know!). I did however, leave a tray of water underneath as I was baking.....

Don't forget to slice the top to allow for more rising before you bake it!!!

One time I also added 2 tablespoons of Italian Seasoning. Yummy!! What a great savory bread!

You can also use this bread for making French Toast, however, do not use the savory version!! The French Toast turned out delicious. :) But that will be another recipe....... ENJOY!!


This blog is linked to Kelly the Kitchen Kop's Real Food Wednesday blog carnivale.

Wednesday, September 7, 2011

My First Harvest.... Broccoli!!!

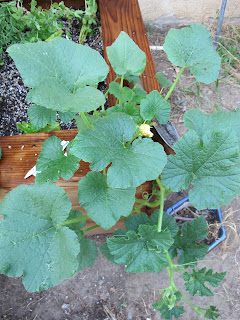
It's amazing how much you learn about gardening while you're doing it! There's a learning curve for sure. I had no idea how big some of these plants actually get and how much space they really need to grow. So as you can see, my garden bed was packed!!!


But I think that's also part of the pleasure, is the surprise at what happens each day. I think I might have harvested my broccoli slightly early, but I was afraid to wait too long and have it bolt on me. The days have been really hot, and it was a surprise to me that my broccoli would still be growing so happily in the middle of summer. I'll be interested to see it grow in other parts of the year.


The only bane to my broccoli was aphids I think. At least that's what my husband called them. Though I thought aphids looked different. These looked like powdery scaley little bugs. And they were on all the undersides of my front broccoli. I sprayed them off with a hose every day. But what I didn't realize is that they'd gotten into the head of one of my broccoli, and I didn't find out until it was cooked! YUCK! I did my best to remove them but I'm sure we ate some. Luckily they only infested one head, not all. Next time I will do things differently.

Has anyone dealt with these guys? What did you do? I would love some input!!!

Here's some more pictures of my garden.......


Monday, August 8, 2011

My Beautiful Raised Garden Bed!


I have been wanting a raised garden bed for a while now. Our soil is SO dense and clay-like that it's almost impossible to dig into, and takes so much to amend. We tried growing last year, but it just wasn't successful for many reasons, some of which were laziness. For me, trying to go out to the backyard while watching a toddler, and gardening, watering, etc is just so tricky. Willow, my kiddo is easier to watch now that she's 2, so it's certainly more feasible to have the garden so far in the backyard. But this year, somehow I managed to coerce my husband into making me a raised garden bed!


We realized that actually, the best sun comes into the front yard, so this was going to be the location for our garden bed. Luckily we have a high fence so the recent issue of vegetable gardening in the front yard has not affected us in the least. And what I love so much about having it in the front yard is the easy access to it from the kitchen!!! I wish I'd thought about this years ago. Okay, well, just sooner anyway. :) So now I can go out and gather fresh herbs for cooking and it only takes me a minute to do so. Yay! I'm converted. Now I want to grow everything edible in the front yard. If only the yard has more sun.....

Here are some other pictures of the front yard garden area....


And just to give you some perspective.... here are a few pictures of what the bed looked like just over a month ago.....


Isn't it amazing how fast your garden grows!!!! I'm so excited for this year's harvest, next year and the years to come.....

Oh and trust me, I will be doing a lot more to the front yard in the next several months/years. :( The beautification project has only begun. I'm hooked!!! :) Get hooked too.... It's so easy to have a raised garden and grow your own organic veggies & herbs! Get out there and garden! :)

Thursday, August 4, 2011

HEALTHFUL RECIPES: Honey Whole Wheat Bread

 This is my favorite bread! It's my go-to bread for everything! It's great toasted with eggs for breakfast. It's great with butter when you're on the go. It makes a nice sandwich! You really can't go wrong with this bread. And it makes 2 loaves, which means you have enough for a family of 4 for the week. :) You will LOVE this bread!


HONEY WHOLE WHEAT BREAD

Ingredients

    * 1 (.25 ounce) package rapid rise yeast (1.5 tsp)
    * 1 teaspoon white sugar
    * 1/2 cup warm water (110 degrees F/45 degrees C)
    * 1 13.5oz can of high fat coconut milk
    * 2 tbsp melted coconut oil
    * 1/4 cup honey
    * 2 teaspoons salt
    * 3 cups whole wheat flour
    * 2 cups all purpose flour
    * 2 tablespoons coconut oil (for greasing pan)
    * an egg (for glazing)

Directions

   1. Dissolve yeast and sugar in 1/2 cup warm water.
   2. Combine coconut milk, coconut oil, honey, salt and wheat flour in bowl. Mix in yeast mixture, and let rest 15 minutes. Add all-purpose flour, and process with dough hook (or by hand) until dough forms a ball. You may need to add more flour to get it to form a proper ball. Knead dough by processing an additional 80 seconds, or mix and knead by hand 10 minutes. Place the dough in a bowl. I usually rub some coconut oil over the top and then cover with a clean towel. Let dough rise for 45 minutes, or until doubled. I often let it rise while I'm napping with my toddler, so oftentimes I let it rise up to 3 hours!
   3. Remove risen dough from bowl, and divide dough in half. Fold and shape each half. I usually roll it over itself into a nice little roll (like how you roll up your sleeping bag), which also helps to squeeze out some of the bubbles and make for a nice loaf. Form into loaves, and place in oiled 9x5 inch bread pans. Oil the tops of the dough again, and cover loosely with plastic wrap. Let rise in a warm area until doubled; second rise should take about 30 minutes.
   4. Place a small pan of water on the bottom shelf of the oven. Preheat oven to 375 degrees F (Though what I often do is to put the loaves in before turning on the heat).
   5. Whisk egg and glaze the tops of the loaves. Then cut slits with a sharp knife down the top of the loaves (to allow for better rising while cooking).
   6. Bake for 25 to 35 minutes (sometimes up to 40), or until tops are dark golden brown. Slice when cool.

I hope you enjoy this bread as much as my family and I do! This bread is so yummy you can eat it all by itself with nothing on it!

Linked to Kelly The Kitchen Kop's Real Food Wednesdays

Friday, June 3, 2011

The New Food Guide - The Food Plate?


So the new Food Guide has come out, and I'm not sure I like it any more than any of the others. It still doesn't really convey how important it is to eat whole nutrient-dense foods, not processed. Or that water is probably the most important element out of all of them. And maybe to focus on organic or homegrown foods over ones laden with pesticides. I mean, how healthy are you going to be if you still follow "The Food Plate" or "The Food Pyramid" but are eating processed foods from the grocery store that have none of the original food nutrients in them but instead have been robbed of them and are now "fortified." Or even simply, foods that are GMO's. I certainly don't know as much as many people about these issues, but I know enough about it to know that people will take the easy way out because the Food Guide is still not clear about what is important to eat and what is healthy! Why don't they make a food guide that says:

Eat whole organic nutrient-dense foods like:


• A variety of fresh fruits and vegetables, preferably grown in your own backyard, with no pesticides.
• A variety of whole grains that have not been processed/refined, like whole wheat bread, oats, quinoa, brown rice, etc.
• A variety of healthy oils/fats, like butter from your own cows or goats, coconut oil, flax seed oil, and olive oils, as well as nuts.
• A variety of protein-rich foods from either/both meat or non-meat sources, both from healthy pesticide/antibiotic/hormone-free sources.
• Large quantities of fresh pure clean water (not bottled)
• A variety of herbs and spices, from pesticide-free sources.

I know I am forgetting some. What one's would you add?

I think that if you are not clear, people will take the easy way out and not change or make a difference in their diet. I think we have to be abundantly clear what is healthy and what is good for you. It's been proven that our SAD (Standard American Diet) of refined/processed foods, is the leading cause of heart disease, diabetes, and a host of other diseases. And that amazingly these diseases are mostly reversible by just choosing to eat healthy and adopt a healthy lifestyle, yet, no one is really taught how to do this or what this means, or even if they are, they may not change.

In making the changes that I have over the years, and teaching myself by reading books and literature, I've realized how much we are poisoning ourselves daily by consuming:

• Pesticides
• GMO's
• Antiobiotics/hormones
• Chemicals
• Highly processed foods like white bread/refined sugar, etc

By even just eliminating these from our diets, we have a better chance of being healthy. Then next by eating foods that are grown in healthy soil, that are allowed to ripen naturally and produce all the necessary nutrients, vitamins & minerals.

I was amazed when I started raising chickens and compared the yolks of my "free-range" chickens that ate bugs, and greens and enjoyed the sunshine, from even "organic" eggs in the supermarket. My yolks were bright orange and full of way more nutrients!

Maybe the trick is going back to growing our own foods at home, raising our own chickens, etc. Maybe this is what will be the best choice for us in the future.

What are your thoughts?

If you were to design a "Food Guide," what would it look like, and what would it say?

Saturday, May 28, 2011

Strawberry Summer Cake AKA Serious Noms!


So I received this GREAT RECIPE in my inbox this week, and since I had some strawberries going the way of the DoDo, I knew I had to make it!

First I made a couple of adjustments to the recipe.

6 tablespoons coconut oil (instead of butter)
3/4 cup barley flour and 3/4 all-purpose flour (next time I'll try whole wheat finely ground too)
1/2 cup honey and 1/2 cup brown sugar (instead of granulated sugar)
1/2 cup high fat coconut milk (instead of milk)

Half of our family has a dairy intolerance, so I wanted to make it dairy-free.

I'm not sure if my adjustments made the cake seem gooier or what, but I ended up cooking it too long. It came out sort of brown and sunken. But I tell you what.... it ROCKED!!! I don't think you can mess up this recipe. Even if it looks terrible, it's still finger-licken' good! This will definitely be a staple in our household from now on. I HIGHLY recommend it!

The above picture is what it is supposed to look like. This is what mine looked like:


Not nearly as pretty, but incredibly tasty! As you can see..... :) I forgot to take a picture when it was first done, and then we ate it! I just made this yesterday too!!! I think you will find the same thing happens at your house.


Here is the full recipe from Smitten Kitchen with my additions: 

Strawberry Summer Cake

6 tablespoons coconut oil, at room temperature, plus extra for pie plate
3/4 cup all-purpose flour
3/4 cup barley flour
1 1/2 teaspoons baking powder
1/2 teaspoon table salt
1/2 cup honey
1/2 cup brown sugar (though I think I'll do all honey next time, like 3/4 cup total)
2 tablespoons of brown sugar (for on top)
1 large egg
1/2 cup coconut milk
1 teaspoon vanilla extract
1 pound strawberries (give or take), hulled and halved

Preheat oven to 350°F. Oil a 9-inch deep-dish pie pan.

Sift flours, baking powder and salt together in a small bowl. In a larger bowl, beat/whisk coconut oil and brown sugar/honey until pale and fluffy. Mix in egg, coconut milk and vanilla until just combined. Add dry mixture gradually, mixing until just smooth.

Pour into prepared pie plate. Arrange strawberries, cut side down, on top of batter, as closely as possible in a single layer (I overlapped to use up all my strawberries). Sprinkle the 2 tablespoons of brown sugar over berries. This makes the berries turn jam-like.

Bake cake for 10 minutes then reduce oven temperature to 325°F and bake cake until golden brown and a tester comes out free of wet batter, about 50 minutes to 60 minutes... though it took almost 10-15 minutes longer for mine, possibly due to the wetter ingredients and milk-substitution. (As Smitten Kitchen says, Gooey strawberries on the tester are a given. Though I didn't do that... I just shook it to see if it jiggled, then stuck it back in for longer if it looked un-done. Which may be why it got overcooked!) Let cool before digging into.....

Then NOM!

Friday, May 27, 2011

Dreaming of Raised Beds


We have a beautiful and spacious yard, ripe for having a garden. In fact, we tried several times! But the combination between a heavy clay soil, and the burden of responsibility being on myself, we haven't achieved much. Last year we got a few peas and a carrot, oh and some tomatoes.

This year we amended the soil, tilled it, and planted seeds. But unfortunately either by planting to early or around too many hungry birds, we grew nothing but 2 broccoli plants. Oh... and a whole heck of a lot of happy healthy weeds!

Now I'm dreaming of raised garden beds! This would solve the problem of the soil, as well as making it easier for me to be sole-tender of the garden.

All I need is wood & soil/compost!!

Here are some of my inspirational photos:

http://www.sunset.com/garden/backyard-projects/ultimate-raised-bed-how-to-00400000011938/

http://gardening.sheknows.com/tag/raised-bed-garden/

http://www.raisedvegetablegardenbed.com/

http://www.homestead-hearth.com/

http://blog.ufpi.com/blog/decking-and-outdoor-living/raised-garden-bed-how-to-build-a-raised-garden-bed-in-three-steps

http://followinginmyshoes.com/around-houston/finders-keepers/

 http://www.popularmechanics.com/home/how-to-plans/lawn-garden/4308264

 http://www.sunset.com/garden/landscaping-design/raised-bed-vegetables-00400000020697/

 http://raisedvegetablegardenbeds.com/the-simple-way-of-building-a-raised-garden-bed

Hopefully my dreams will become a reality soon enough!! I just don't know how long I can wait........

So if you were planning a raised garden bed(s), what materials would you use to make the bed, and what dimensions would you make it in? I'm thinking cedar and 18-24" high with a dimension of 3x5 or so. I have to be able to access the whole thing easily. Admittedly I have a physical disability, so it has to be easy for me to manage without too much movement on my part.......

Thoughts?

Tuesday, May 3, 2011

Planning a 2 Year Old's Birthday Extravaganza... or making sure kids AND parents have fun!


So my kiddo's 2nd birthday is coming up in a few months, and I feel like I want to make it special. Last year we didn't have a party at all. I wasn't too worried about it, she was only 1. She wouldn't remember it, and at that age, the party is really for the adult attendees and not the kid. But this year, she's fully conscious and aware of her world, and I think it would be a great year to start making her birthday rituals.

So to start, it's important to me that there be good, healthy food. That there be fun, creative, eco-minded activities or crafts. And that the parents have just as much fun as the kids.

I'm planning a kid menu, activities/crafts for the kids, an adult menu, and beverages for all age groups. Here are some ideas I have so far:

Kids Menu-
Lemon Bars
Fruit salad in coconut yogurt
Mini pizzas on whole wheat sourdough
Sweet potato fries
Frozen banana "ice cream"
Pita with hummus


Adult Menu-
Orzo salad
Frittata (veggies, and one with ham or sausage)
Roasted small potatoes in olive oil, rosemary and garlic
Green salad

Kids Activities-
Finger painting with homemade finger paints (or these yummy edible finger paints)
Playing with homemade play dough
Having a wading pool

Beverages-
Lavender Lemonade

Still brainstorming!!!

What ideas do you have? I'm looking forward to hearing some great ideas!

Saturday, April 30, 2011

My 9 Year Old Daughter Wants to Be a Vegetarian


As a family, we eat as an omnivore. Individually, we eat differently. I, myself, am mostly vegetarian, though I do eat meat when it feels right. My youngest daughter eats like I do. We also do not eat dairy. This is due to a milk allergy. My eldest daughter and my husband have been mostly die-hard meat-eaters. This is why her request/desire surprised me. Not to say I wouldn't be overjoyed at the very least! But I also wanted to make sure it was what she really wanted, and needed, at this point in her life. I'd like to say I take a balanced perspective.

One thing that may have motivated her desire to be a vegetarian, is her understanding of the treatment of animals in order to become food for the masses. To me, it is important that my family (or anyone for that matter) be aware of where their food comes from and how it is produced. That goes for vegetables, processed foods, and yes, meat. I don't want my kids growing up being disassociated from the foods they eat. I don't want them going into a store to buy their food and not understand what it takes to get it there, and all the hard work before that. I want them to be connected to their food source. I want them to be educated and make educated choices.

I felt my eldest was old enough and intelligent enough to begin to understand where her food comes from, and to make choices for herself as to how she should be eating. I mean, afterall, she will be taking care of herself eventually, and making all of her own choices eventually. So why not start now? I also use this as part of my parenting technique. If a kid understands WHY to do or not do something, and is allowed to make that choice for themselves (consequences too) then I think this teaches them to think intelligently.

I only do the best that I can as a parent. I try to lead by example. I try to give the materials and education my child needs (inside & outside the classroom). I try to provide learning tools at ripe learning moments. And then it's up to the child to go from there.

So in the case of my daughter wanting to be a vegetarian; what is right for her? I don't know. But I do know we are going to watch "Food Inc" and I am going to give her books and materials to help her make her own choices. This includes varied nutrition books, books on vegetarianism, books on whole foods nutrition & eating healthy meats and foods grown with love, books on eating closer to the source, and materials from PETA and the ethical treatment of animals. Basically everything she needs to make an intelligent choice for herself.

And of course, reminding her that if she were a vegetarian, there'd be none of her favorite foods... like bacon, ham sandwiches, etc.

I admit, I would try to steer her towards the idea of first starting with eating foods closer to the source. Eating foods that have not been processed. Eating foods that have been made with love. All of those things go into making healthier more nutritious foods. I would encourage her to start small. Like by eating meats that were, as animals, cared for lovingly and given free range to roam.

And if she still wants to be a vegetarian, then great! I'm all for teaching her how to do that in a healthy way.


I understand her desire! She'd said to me the other day, "I just don't think I can eat something I care about. I don't want to eat chicken anymore because I love them." Who can argue with that?

We do teach her that eating meat is part of survival for many species. And that if you care for and honor the animal, that this is better than how they are treated in factory-farms. But I am all for not having as much meat in the house.

I myself was raised a meat-eater. But I became I vegetarian when I lived with my father and step-mother for several years. They are die-hard vegetarians! So much so, that my step-mother said she would not marry my father if he dare ate any meat, ever again. To me, this is a bit severe. I was a vegetarian when I met my husband. And he, a die-hard meat-eater!! VERY much so! We've figured out how to blend our diets some, so that we can live together. He knows I will not cook much meat, so if he wants it, he will have to make it himself. I will cook simple meats to add to their meals, like heating sausage for example. Or I enjoy making fish at times. So, not having to cook as much meat, is fine by me.

But I am also not that selfish as to steer her choice because of my desires. I want her choice to be her own. And as I said, I will give her the tools to make an educated choice. That is all I can do.

Friday, April 29, 2011

HEALTHFUL RECIPES: Whole Wheat Honey Raisin Oatmeal Cookies


Okay, so I was in the mood for something sweet and had nothing good in the house to satiate my desires. It was up to me to make something quick!

I speedily googled "healthy cookie recipes" and found this RECIPE with which to work off of. I tweaked it a bit and came up with this:

Whole Wheat Honey Raisin Oatmeal Cookies

Ingredients:
1 cup freshly ground whole wheat flour (I had a cup leftover in my fridge)
1 1/2 cups rolled oats
1/2 tsp baking powder
1/2 tsp baking soda
1 tsp cinnamon
1 tsp vanilla
1 egg
1/2 cup coconut oil
1/2 cup honey
1/2 cup raisins

Being in a rush and feeling lazy, I threw it all into the mixer at once. First I mixed it mostly that way, then I used a spoon to mix the last bits so that it would not be over-mixed, but definitely mixed. I found I had a lot of WW flour on the bottom of the bowl, so it took a bit of spoon-mixing to get it combined.

Then I used my mini cookie scoop and cookie sheet with silicone liner. Placed 12 cookies on the sheet in nice little round balls. Didn't bother flattening or anything else. Just shoved them in the oven.


I used their suggestion of 335 degrees. I didn't pre-cool (again in a rush). I'm not sure how long they cooked, but suffice to say, I looked to see that they were golden brown. :)

And Yes, they were delicious!!! Okay so the freshly ground whole wheat was a bit crunchy. I definitely need a way of grinding finer grain. But it was wonderful regardless!

And yay... I have sweets! Sweets I even feel good sharing with my 21 month old. :)


 Posted on Real Food Wednesday
Related Posts Plugin for WordPress, Blogger...